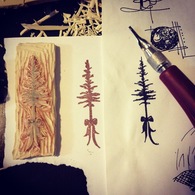
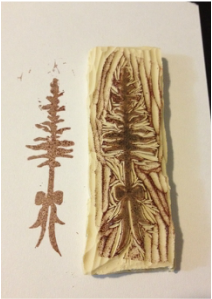
 Carved stamp, test print, and original sketch. Carved stamp, test print, and original sketch. For my first DIY post I decided to write about stamping since it is so fun and versatile, AND I was just about to make a stamp for myself anyways. There are so many different ways to make stamps (who didn't make a carved potato stamp when they were a kid?) so I am going to feature different methods each week and various uses for stamps. The technique I am covering today is a more advanced version of stamp making as it really is a form of relief printmaking. Relief printing simply means that you cut away from what you don't want and only print the raised areas. But, if you bear with me the future posts will involve easier stamping techniques. (Side note: printmaking has a rich history worldwide. For some interesting history and information on other forms of printmaking check this out.) However, with only a few tools and materials you can make your own custom stamps that will last forever, unlike those potatoes! Here's what you need:
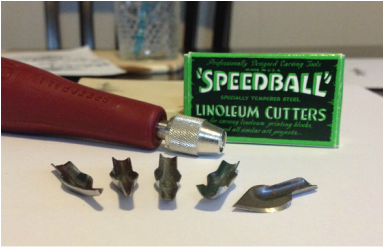
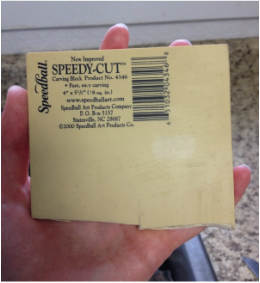
Speedball makes affordable linoleum cutters (the red handled thing) that you can buy at retail art stores for about $7. There are actually 6 cutting tools that you can buy in a small package, and then you'll also need a piece of either Speedy-Cut (pictured right) or the pink version called Speedy-Carve. Don't actually buy linoleum because it is much more difficult to carve and you have to heat it so it gets soft. Aka -- too much hastle, less time to art! The Speedy-Cut material that Speedball makes is soft like a white eraser, and super easy to carve. The only downside is that you can easily cut into it with a fingernail by accident, and potentially ruin a carving. So, cut those nails short or be extra careful while using this material! Okay, so Step One: Design your stamp! Doodle a bunch of ideas on paper. Make it the size you want it to be, or shrink down your design with a photocopier if you have access to one. A good starting size would be two to three inches long. For your first time using the carving tools, you'll want to keep your design fairly simple, without much intricacy. My design is fairly intricate, so don't use mine as a guideline for detail!!
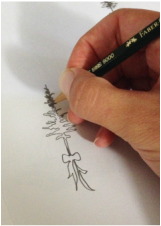
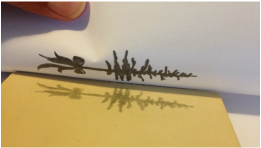
In the left photo I have my design sketched out. Your sketch will be what your stamp will end up looking like, so no need to reverse the image. In the middle photo I am filling in the whole design with a nice soft pencil, like a 4B or 6B (this is Step Two.) It is better to use a soft pencil for this because the graphite will transfer easier in Step Three, however if you only have HB pencils, just go over the image really well. Step Three: To transfer your image, simply place it face down on your Speedy-Cut, hold in place, and rub the back of the paper all over the design with your fingernail. When you lift up, your design will have been transfered! Photo three shows my transfer. If you have transfer paper, by all means use that! Just remember that on the Speedy-Cut, your design must be the mirror image of your drawing. 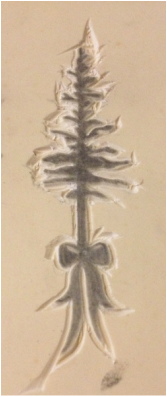 Outline cut is done. Outline cut is done. Step Four: Begin carving! I recommend practicing and trying out all the different cutters first so you know how it feels and what they can do. I usually pick a V shaped tool for my first outline cut of my image. There are a couple different V shaped cutters, so depending on how deep you want to cut and how detailed, choose appropriately. The bigger the V, the deeper the cut. The wider the V, the more area you will cut out at any time. Remember, you will be cutting out around your design. Cut off everying BUT your transfered image, not the image itself. Safety First! Avoid accidental impailment by carving away from your body. This includes keeping your face away from the carving tool, and not carving towards the inside of your hand. Also, keep your Speedy-Cut on a grippy surface like a table, not a slippy surface like a piece of paper. You should be fine. This is a fairly safe version of carving! Step Five: Keep carving until you've carved away everything but your image. If your image is much smaller than your piece of Speedy-Cut, you can cut out your image with scissors, an exacto knife, or your straight edge cutter tool. This will save the rest of your piece so you can make more than one stamp with your Speedy-Cut!
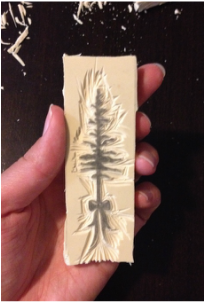
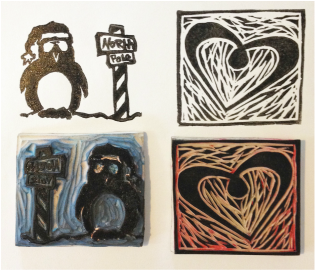
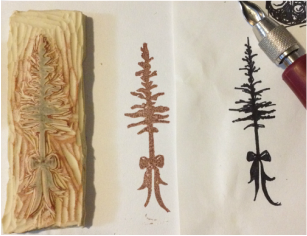 Stamp, print, and original sketch from left to right. Stamp, print, and original sketch from left to right. On the left, my stamp is cut apart from the larger block. On the right, I have finished carving and done a test print to find areas I need to cut deeper or more precisely. So, Step Six is to do a test print and make corrections! You are almost done! On the left is my completed stamp and print with the initial drawing. Once you are happy with your stamp, you can keep it forever and put it on Christmas cards, business cards, or marked papers (for you teachers out there!) Here are some examples of other carvings I have designed and carved for holiday cards.
Let me know if you try this out! It's really fun and kind of addictive. It's very useful if you are into making your own holiday cards or homemade wrapping paper. I would love to see what you come up with, and if you have any questions or need help, comment below! If you would like a custom stamp made, send me a message! Thanks for reading:)
-- Amy
0 Comments
|

AuthorMakers gonna make! Categories
All
Archives |

 RSS Feed
