|
It feels like I haven't made art in SO long! Last time I posted here was in September. There must be something that takes up all my time starting in that month. Hmmmm. Glad to be back at it though, even if its prepping for class art projects. Nothing makes me happier! 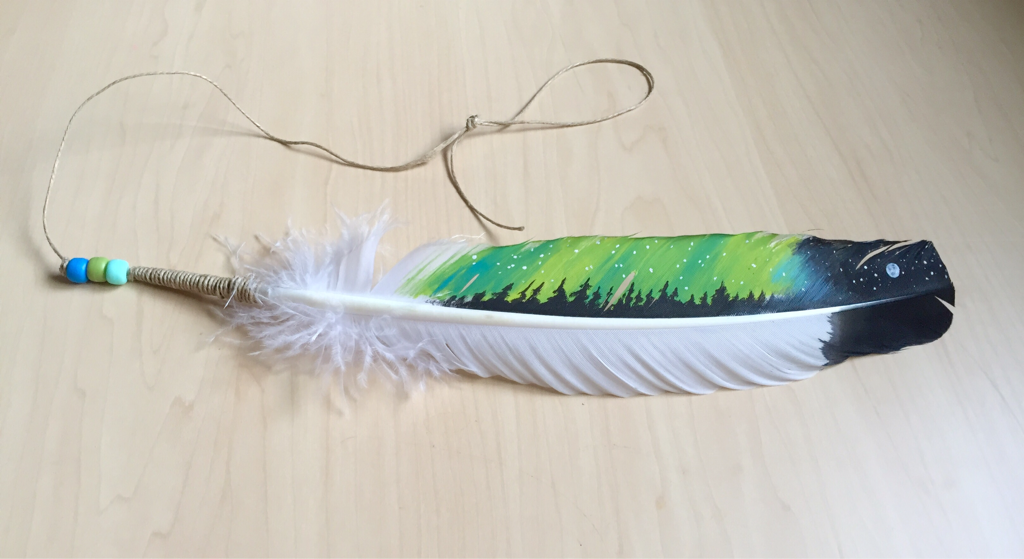 Northern lights feather painting craft. Painting on uncommon surfaces has always been a fun challenge for me, so when I saw painted feathers on Pinterest and stumbled upon some imitation eagle feathers at Creative Zone I thought it was a sign from the art gods who haven't spoken to me much lately. With four colours of craft paint, some hemp cord and matching pony beads, I made a northern lights scene on this black tipped feather. I figured the techniques used were simple enough that my grade sixes could handle it and they are now in the middle of creating feathers for Mother's Day gifts. We'll make cards to go with it that say a related quote such as "I love you to the moon and back!" 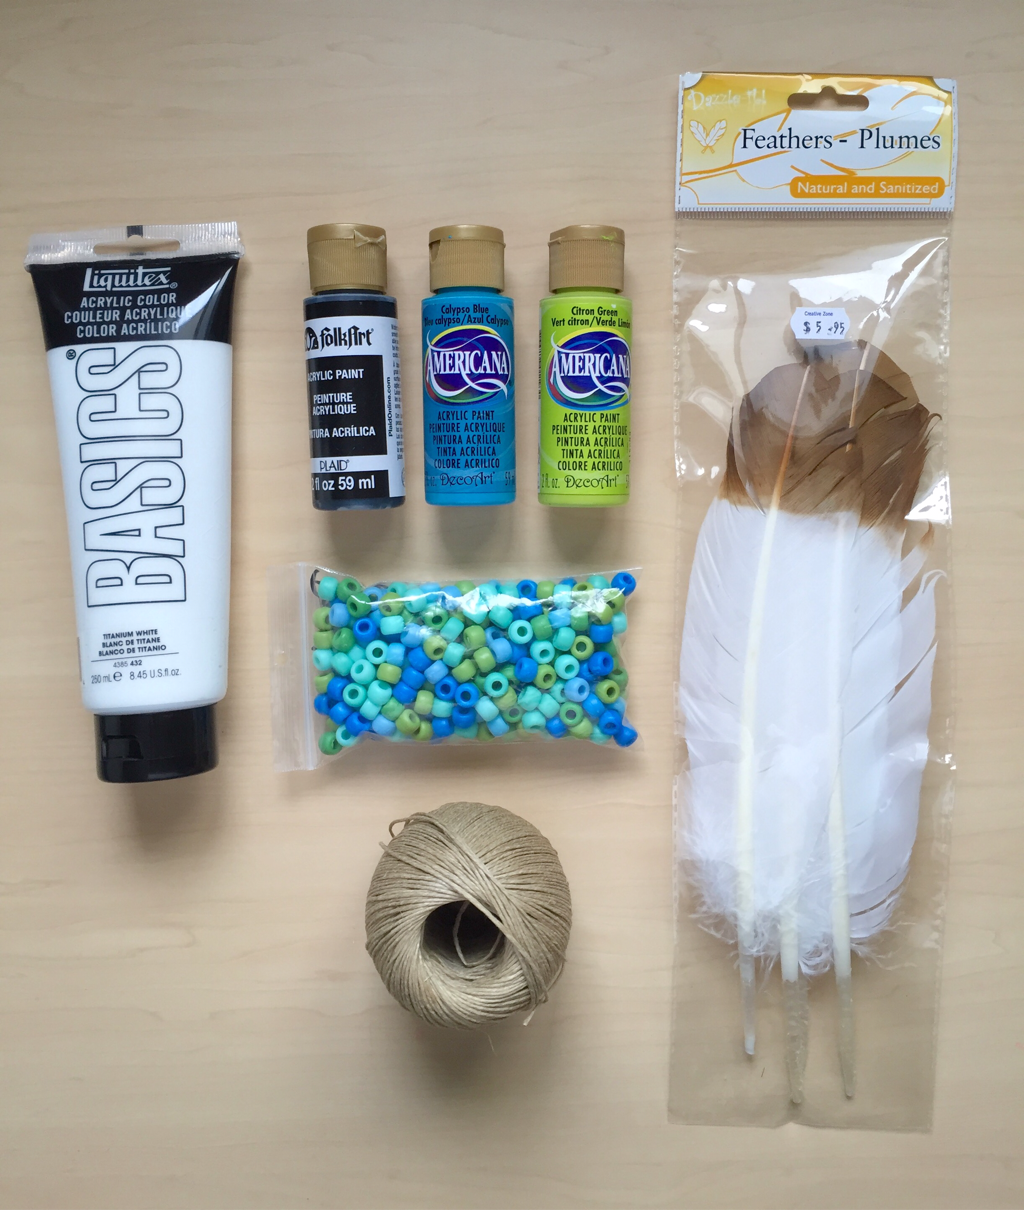 Supplies: Bright green and blue paint, black paint, white paint, large feathers, matching pony beads, and hemp cord. Pictured above are all the main supplies used in this craft. Additionally you will need a small flat or angled paint brush, a round paint brush, white glue, and scissors.
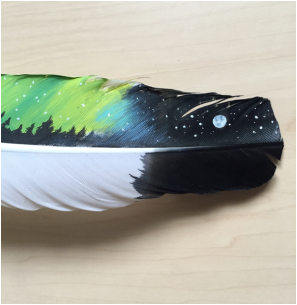
Finishing touches Step Six: After all the paint is dry, apply a thin layer of white glue to the quill (or "calamus" as I learned from a google search) and make a nice tight coil wrap with hemp. I wrapped the hemp around the cut end so it stayed in place without having to tie it on. Step Seven: At the end of the quill, tie a few knots in the hemp cord, add some beads, and tie it off again. Keep the hemp cord as long as you like if you want to hang it up in a window or as part of a mobile. I think this part would look better with a braided hemp, but I didn't get that far today. 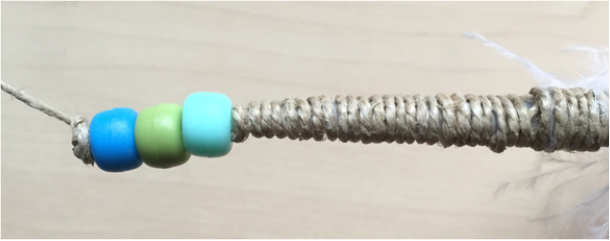 Hemp cord wraps around the feather's quill, attached with white glue. The three pony beads add colour to the end and match the paint. Knots in the cord keep them in place. 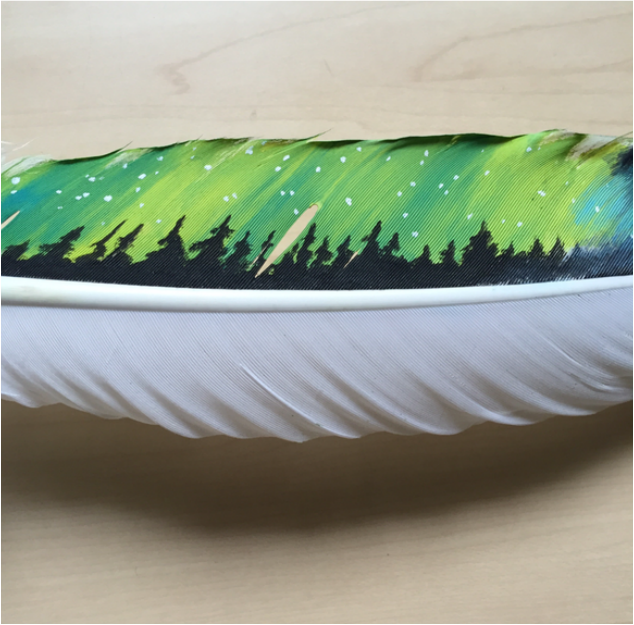 Detail of tree silhouette and a split I got in my feather painting. Thanks for reading, and happy crafting!
-- Amy
3 Comments
|

AuthorPassionate for creating, I record my artistic projects and ideas for the joy of sharing with you and challenging myself to continually grow as an artist. Categories
All
Archives
May 2016
|
 RSS Feed
